Step 1 - Reading traces
In this step we will see how to read/import traces from a recording in a SAF file (or plain text).
The files necessary for this step (and whole tutorial) are in the "Tutorial" folder within the "Examples" folder of the program.
1) |
Click on the "New" button in the main menu to create a new project in Easy HVSR (the program asks you to confirm saving before proceeding) |
2) |
In the screen that appears, if you want, you can enter the general data of the project, which will be useful later for the sole purpose of creating a comprehensive computation report. These data do not affect in any way the analysis |
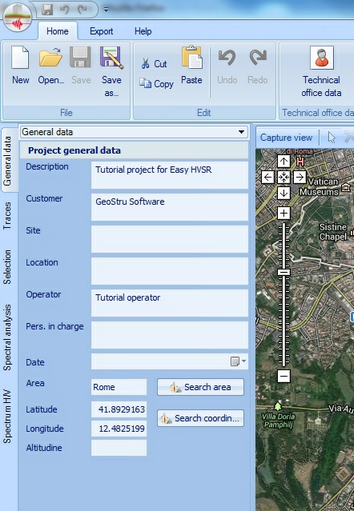
3) |
Then we insert the recording made in situ by clicking on "Traces" |
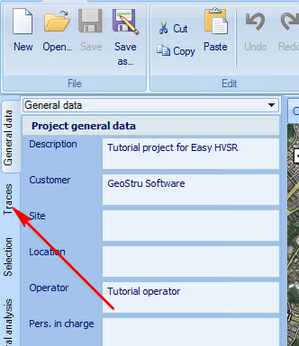
4) |
We click on "Read traces"
|
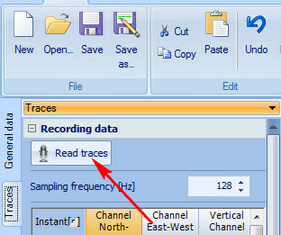
5) |
This will open a dialog box that will allow you to select the file to upload. We choose the folder "Tutorial" (is located inside the installation folder of the program, typically it should be something like "C:\ Program Files\ Geostru\ EasyHVSR\ Examples\ Tutorial" ), and we choose as a filter "SESAME ASCII (*. SAF)"
|
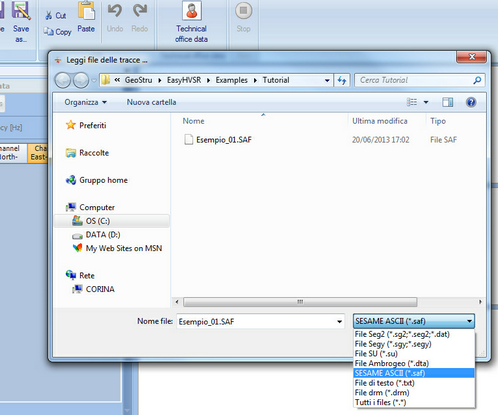
6) |
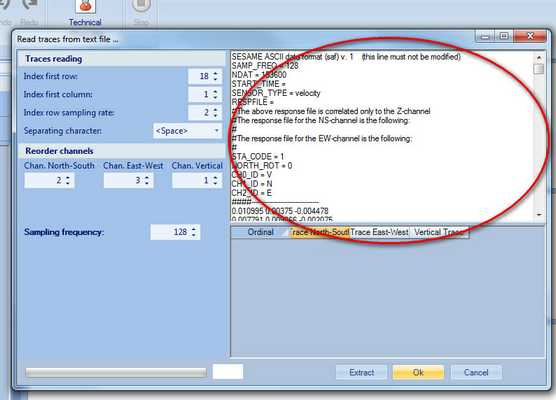
Opening the "Example_01.SAF" file is opened the following window that allows to import traces from this type of files |
7) |
In the right section of the window, the one shown in the image above, is a preview of the contents of the SAF file just selected. The SAF files are divided in two main parts: the first with general data and a second one with the registration data of the three channels of recording instrument. This window allows to interpret the contents of the file as described below. |
8) |
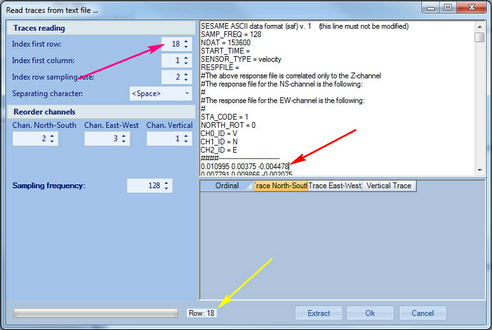
In the preview pane of the SAF file (shown in the image above), click on the first line that contains the data of the recording, ie at the point marked with a red arrow in the image below. |
9) |
Is written the value indicated in the point highlighted with the yellow arrow ("18") in the case for the "Index first row:" indicated by the pink arrow. |
10) |
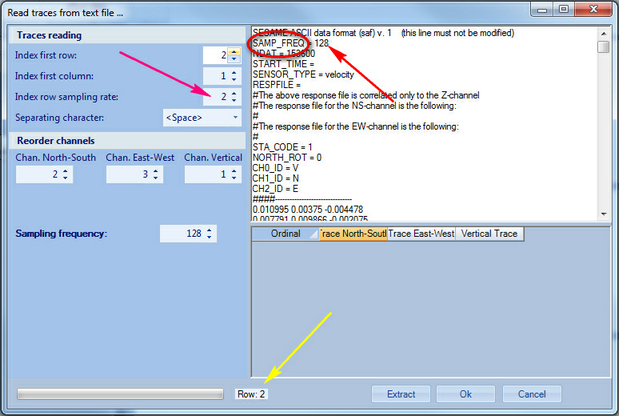
Also in the preview pane of the SAF file, click inside the row that contains the information about the sampling frequency (red arrow in the image below), which is typically reported as "SAMP_FREQ = xxx", highlighted with a red circle in the following image. |
11) |
Similarly, copy the value indicated by the yellow arrow ("2") in the field to "Index row sampling rate" indicated by the pink arrow. |
12) |
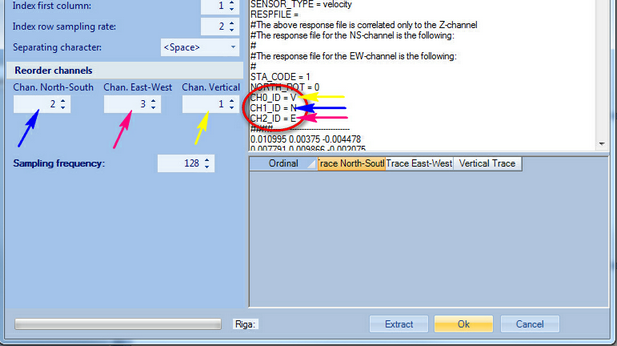
At this point is verified that the import order of the channels is correct. In the first section of the SAF file, as already mentioned, is contain more general information, such as notes the order in which the channels are shown in the later part of the recording. This information is shown in the next image. |
13) |
You can read that the channels are in the following order: Vertical, North-South and East-West. In agreement with the color of the arrows in the image above, fill the fields relating to "Reorder channels", that is to say that the channel "North-South" is in column number "2", and similarly for the other two. NOTE: When you import a SAF file the visible order in the image above is the default one. So unless some anomaly in the SAF file these values do not need to be changed. |
14) |
At this point press the button "Extract", and in the table in the right side of the window we see a preview of the data that will be loaded in Easy HVSR. If all went well, things should be similar to those seen in the next image. |
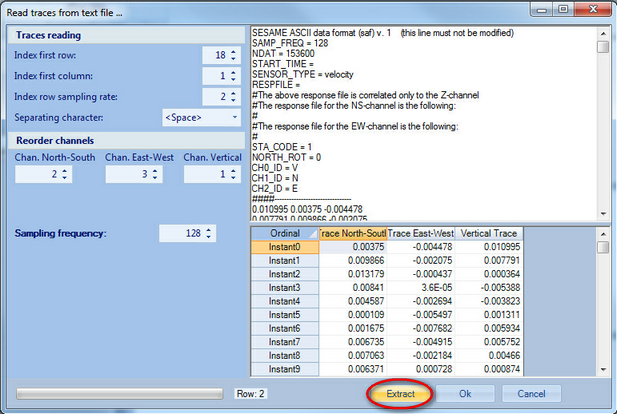
15) |
At this point press "OK" the data will be loaded in the software, obtaining a result similar to the next image: |
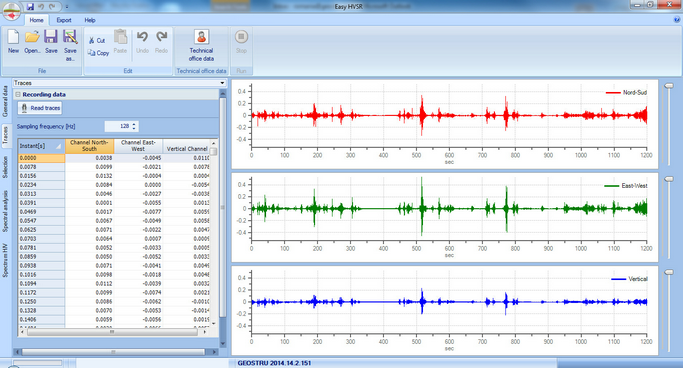
16) |
Now we can save the first step of the work by first pressing the "Apply" button immediately after the table, and then "Save" in the main menu.
|
|
© Geostru