Textures
In the updated version of the software it is possible to customize the textures / patterns according to your needs. The new symbology introduces the possibility of inserting personalized screens:
a)image (.bpm);
b)with linear filling and with symbols (.pat);
a)How should you proceed to insert an image .bpm?
Copy and paste the new texture into one of the folders ("Cohesionless", "Cohesive", "Others", "Rocks") containing the files in.BMP format. They are located in the "Textures" folder associated with the package of the installed software [Fig.1].

Fig.1
Once the new texture has been inserted, the file must be renamed and assigned a number (eg.: “99.bpm”) [Fig.2].
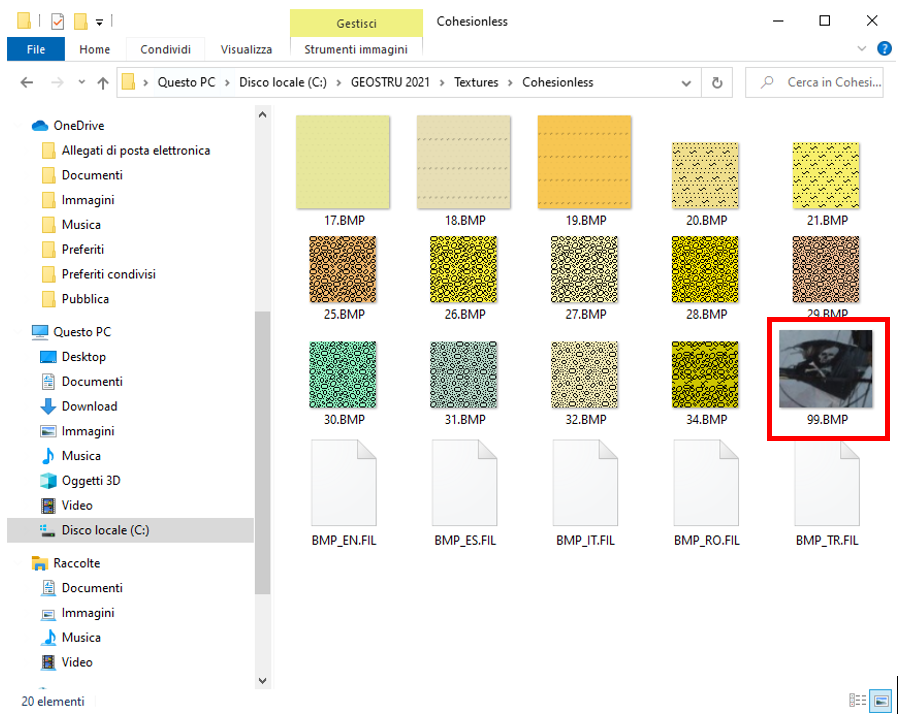
Fig.2
Next, Open the file "BMP_EN-FIL" in the same folder with a text editor (eg. Notepad) and at the bottom of the page add a description of the new file inserted [eg.: "argilla 99"; Fig.3].
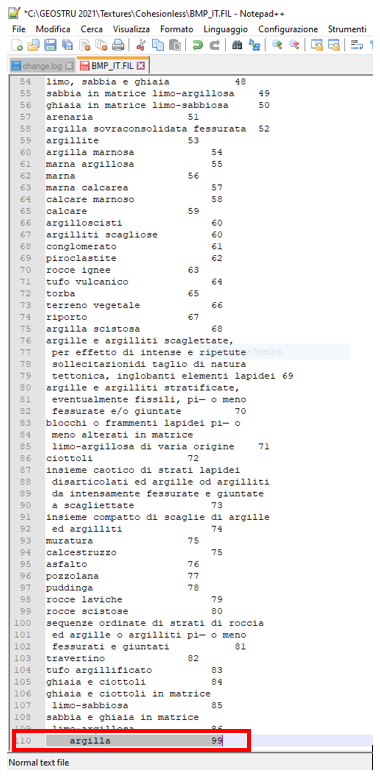
Fig.3
b) How to insert a “hatch pattern”?
To add a hatch pattern it must be saved in two formats: .gif and .pat.
The .gif file shows the type of texture that will be used (preview) while the .pat file is the raster that will be applied within a geometry.
You need to copy and paste the files into the "Hatch" folder (located inside "Textures").
Note: The two files (.gif and .pat) must be renamed in the same way: description_code of the pat file [Tab.1].
Icon
|
File name |
|---|---|
|
Limestone_HBSLIMES.gif |
|
Limestone_HBSLIMES.pat |
The code of the .pat file to be attributed to the two files must be taken from the same .pat file: it is necessary to open it with a text editor and copy the code of the first line [Fig.4].
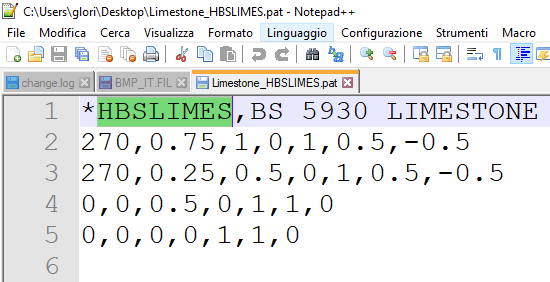
Fig.4