Nel seguito viene mostrato un tutorial che vuole rappresentare una guida nell'utilizzo passo passo di RSL III 2D. Nell'esempio mostrato si valuta la risposta sismica locale di un rilevato, ma gli stessi passi possono essere eseguiti per analizzare la risposta sismica locale di qualsiasi problema.
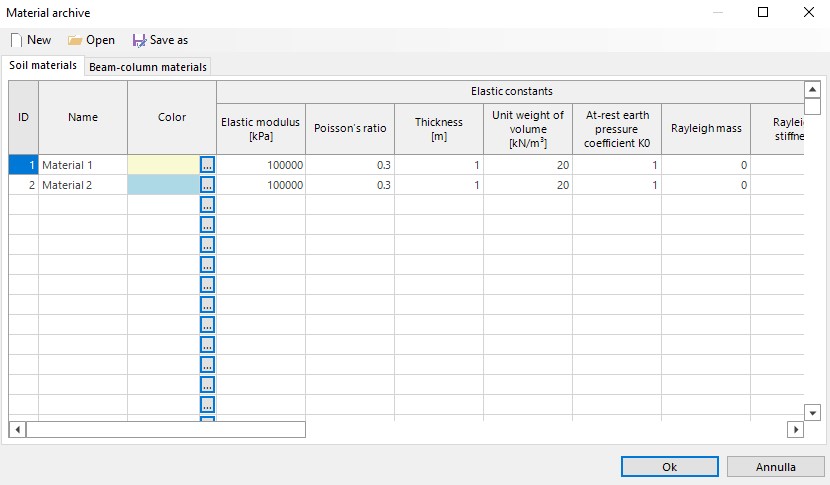
STEP 1
Assigning the geotechnical characteristics of the soils involved..
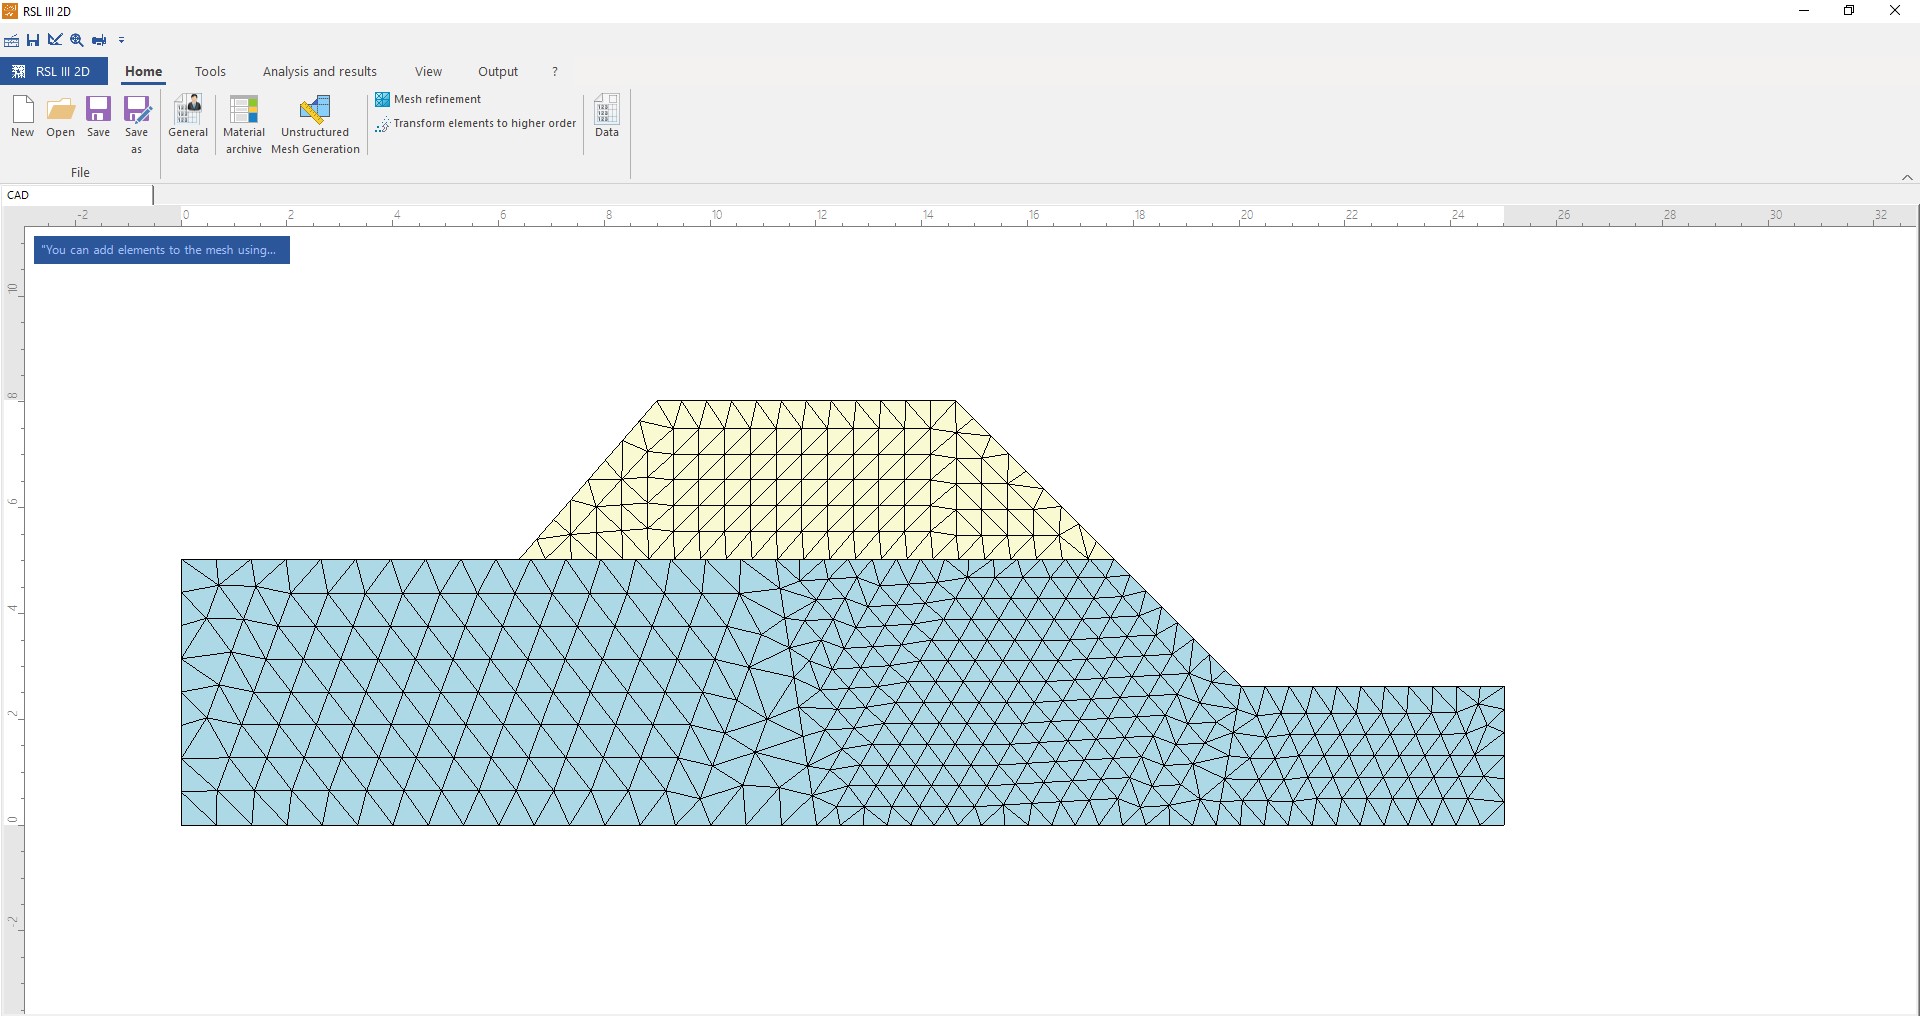
STEP 2
Define a geometric model representing the problem to be analysed and generate the corresponding calculation mesh.
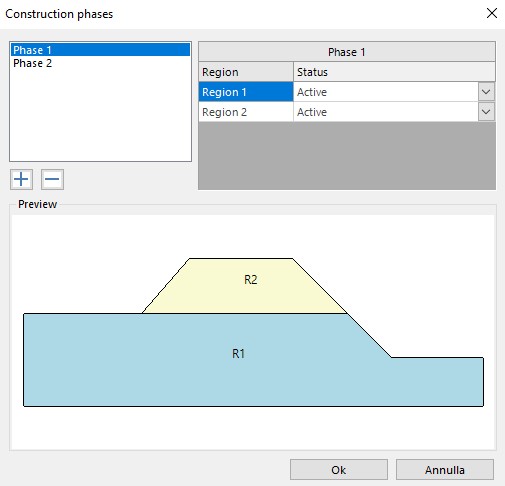
STEP 3
Define two calculation phases in order to:
1) calculate the tensional state of the ground;
2) perform the local seismic response analysis.
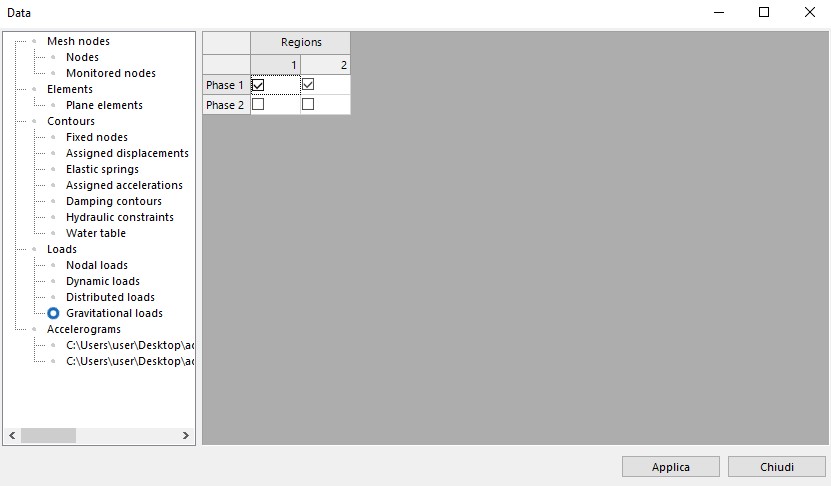
STEP 4
Assign gravitational loads only to the first calculation phase, deactivate them for the second:
STEP 5
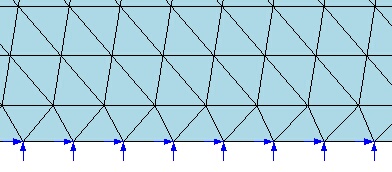
Assign boundary conditions, which must be different for the two calculation phases:
- Phase 1: displacements in the horizontal and vertical directions along the bottom edge of the model are blocked, while only displacements in the horizontal direction along the side surfaces are blocked;
- Phase 2: Damping contours along the vertical and bottom edges of the model are assigned. In addition, displacements in the vertical direction with reference to the bottom edge are blocked. Finally, the bottom edge must be prepared for the application of an accelerogram.
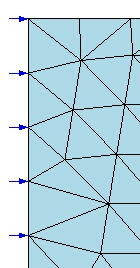
Constraints Phase 1

Constraints Phase 2
STEP 6
Add any monitored nodes.

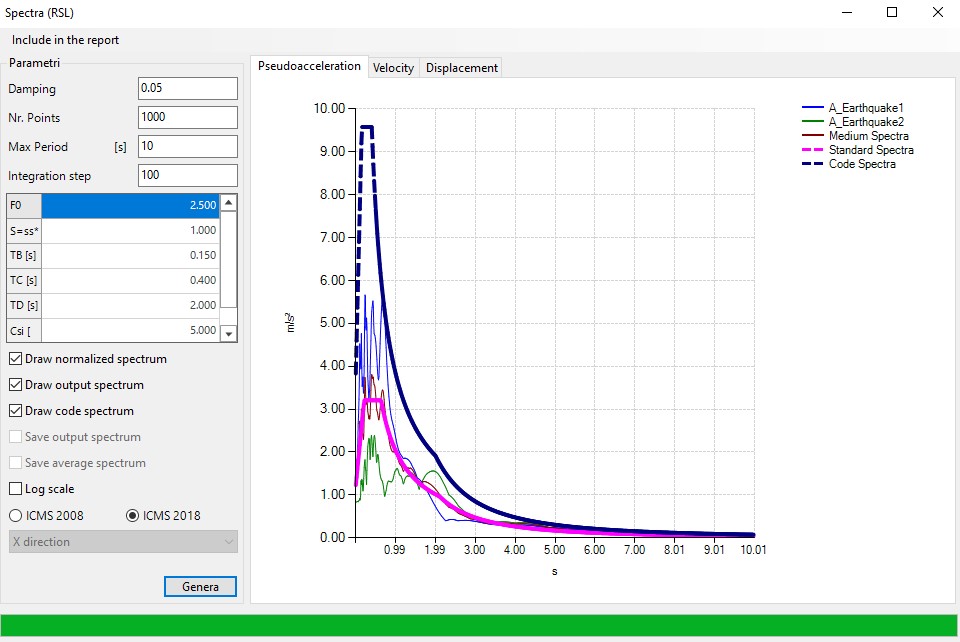
STEP 7
Import accelerograms to be used for analysis.

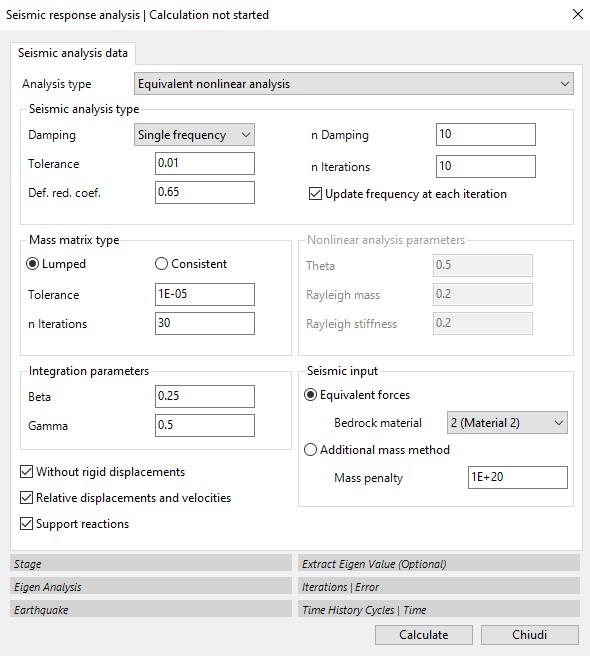
STEP 8
Perform local seismic response analysis.
STEP 9
Display the results.